Product Photography for Online Stores on a Budget
You do not need a studio to photograph your store's products well. The basic kit, a shot list for every product, consistency rules, and how to size, compress and name images for your store.
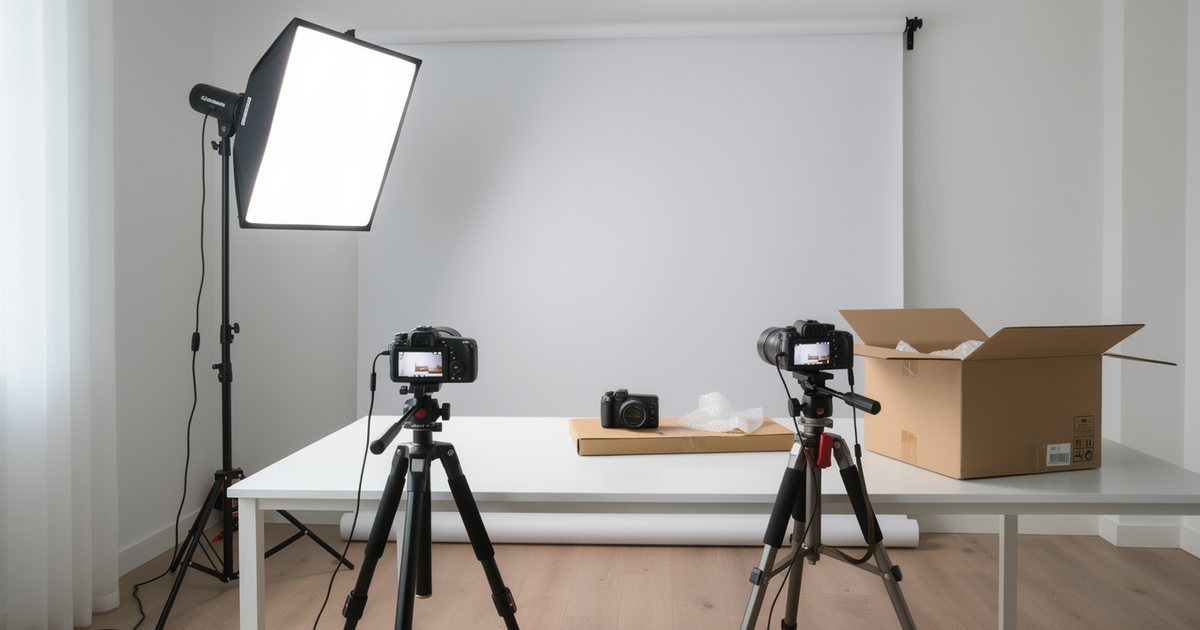
Product photography for online stores does not need an expensive studio. It needs a fixed setup you can repeat for every product with the same result. In a store, the photo stands in for picking the product up and turning it over, so its job is to show the item clearly and accurately, and to make the whole catalog look like one consistent family. This article takes the store's point of view: which shots you need, how to keep them consistent, and how to prepare files for upload. For technique such as exposure and composition, see Photography Fundamentals: The Complete Guide, and for the bigger picture of building a store, The Complete Guide to Starting a Successful Online Store.
What a product photo has to do
A product photo in a store has four jobs, and each one needs different shots:
- Catch the eye on category pages: the thumbnail has to read in a split second among dozens of products.
- Inform on the product page: details, texture, real size, and ports, stitching or ingredients.
- Reassure: accurate color, every available variant, and what the customer will find in the box.
- Reduce returns: every gap between the photo and the actual product turns into a return or a bad review.
The basic kit on a small budget
- Camera: a recent phone with a good camera handles most products. Use the main lens and avoid digital zoom; if your phone has an optical telephoto lens, it reduces shape distortion in close-ups. Settings are covered in Professional Smartphone Photography, and if you want a dedicated camera, see Choosing the Right Camera and Lenses.
- Tripod: with a phone clamp and a remote or self-timer, so the frame stays fixed from product to product.
- Light: a large window with indirect light and a thin white curtain to diffuse it, or two continuous lights with softboxes. Do not mix light sources of different colors in one shot, such as window light with a warm bulb. The fundamentals are in Lighting in Photography.
- Background: a sheet of white paper curved from the wall down onto the table so no horizon line shows behind the product, or a small light tent for small items.
- Reflectors: white foam boards to fill shadows, and black boards to define the edges of glass and shiny products.
- Small tools: tape, clamps, sticky putty to stand products up, a microfibre cloth, cotton gloves for shiny surfaces, and a gray card for color.
Setting up your shooting corner
- Place a table beside the window so light comes from the side of the product, not from behind it or from behind the camera.
- Fix the curved backdrop and place the product in the middle, a little away from the wall so its shadow does not fall on it.
- Put the white reflector on the side opposite the light to soften the shadow.
- Set the tripod at a fixed height and angle, and mark the position of its legs and of the product with tape.
- On the phone: turn off the flash, lock focus and exposure with a long press on the product, switch off filters and beauty modes, and turn on the grid to keep lines straight.
- Take a test shot and compare it with an approved reference image before you start the batch.
Those tape marks look like a small detail, but they are what make the photo of product number 40 match product number 1.
The shot list for every product
| Shot | Purpose | Tip |
|---|---|---|
| Main image | Category pages and ads | Front view on white, product filling most of the frame |
| Angles | Understanding the full shape | Side, back and 45 degrees, plus top-down for flat items |
| Details | Showing quality and texture | Stitching, texture, ports, ingredient label |
| Scale | Understanding real size | In the hand, on the body, or beside a familiar object |
| Variants | Showing every color or size | Same angle and light for each color |
| Box contents | Knowing what will arrive | All items laid out in one shot |
| In use | Helping the customer imagine it | The product in its natural setting, also useful for social media |
Shoot the first three for every product before moving on to lifestyle shots; those core images are what the store needs to function. You can add a short rotating video later if your platform supports it.
Consistency: what makes a store look professional
Customers do not see one photo. They see a grid of photos on a category page, and any variation looks messy. Standardize the following and write it on a single reference page for anyone who shoots or edits:
- Background and color temperature: neutral white in every photo, with no images drifting toward blue and others toward yellow.
- Aspect ratio: square (1:1) is common in stores, and portrait (4:5) often suits fashion. Pick one ratio that fits your store theme, and check your platform's recommendation.
- Product size in the frame: an equal margin around the product in every photo, so nothing looks giant next to something tiny.
- Camera angle and height: fixed for each product category.
- Shadow: a soft natural shadow under the product, or none at all, but handled the same way in every image.
Accurate color to reduce returns
Color is the most common complaint in clothing, homeware and cosmetics. To keep it accurate:
- Set white balance manually, or with the gray card, in the first shot of every session.
- Do not boost saturation to make the image "prettier"; that is a promise the product will not keep.
- Compare the final image with the real product on more than one screen, including an ordinary phone.
- If a color cannot be shown accurately, such as some neon shades or metallic finishes, say so in the product description.
Editing is there to show the product as it is, not to change its shape, color or size. Any edit that changes what the product really is can count as misleading, and it comes back to you as returns and negative reviews.
Products that need special handling
- Shiny and reflective items such as jewelry, perfume bottles and metal: use a large, diffused light, white boards to create clean reflections and black boards to define edges, and check that neither you nor the phone appears in the reflection.
- Transparent items: lighting from behind through diffusion paper outlines glass and liquid.
- Clothing: iron or steam before shooting, then choose one style: flat lay, mannequin or model. Photos on a model help customers understand cut and length.
- Small items: move in close with the tripod, use close-up mode, and make sure every detail is sharp.
- Food: has its own rules for light and styling, covered in Food Photography for Restaurants and Cafés.
Quick batch editing
Edit in batches with shared settings instead of editing each image from scratch: crop to your template, straighten, match exposure, clean the background to pure white where needed, remove dust and fingerprints, and keep the shadow natural. Tools such as Lightroom, Photoshop and some phone apps let you copy settings from one image to the rest of the batch. If you use automatic background removal, check the edges closely, especially around hair, fur and transparent parts. A complete editing workflow is in Photo Editing: A Professional Workflow.
Preparing files for your store
- Dimensions: upload images large enough for zoom to work; around 2000 px on the longest side is common. Check what your platform and theme recommend.
- Format: JPEG or WebP for normal photos, PNG only when you need a transparent background.
- File size: compress images to the smallest size without visible loss, since heavy images are among the biggest causes of slow store pages. More in Website Speed.
- Color profile: save images in sRGB, the standard browsers expect.
- File name: descriptive, lowercase Latin letters, words separated by hyphens, no spaces or Arabic characters, and including the product code, color and angle, for example oud-malaki-100ml-black-front.jpg. Arabic characters in file names turn into long, unreadable codes in URLs.
- Alt text: a short sentence describing the product in the image, in each of your store's languages, for people using screen readers and to help search engines, without keyword stuffing. See SEO for Online Stores.
- Organization: one folder per product named by SKU, with unedited originals kept in a separate folder.
Common mistakes
- Different backgrounds and lighting from one product to the next.
- Using supplier images or pictures found online without a license, which is both a legal and a marketing problem; see Image Rights and Licensing.
- Over-editing until the product looks different from reality.
- Only one photo per product, or low-resolution images that blur when zoomed.
- A large watermark covering product details.
- No indication of real size, so the customer gets a surprise on delivery.
Checklist before upload
- Is the setup fixed and marked, and does the test shot match the reference image?
- Does every product have a main image, angles, details and a shot showing scale?
- Was every color shot at the same angle and in the same light?
- Do colors match the real product on more than one screen?
- Are the aspect ratio and the margin around the product consistent?
- Are dimensions large enough for zoom, the file compressed and the profile sRGB?
- Are file names descriptive, and is alt text written in Arabic and English?
- Do the photos match what the product description says?