The Exposure Triangle: Aperture, Shutter Speed and ISO
How to balance aperture, shutter speed and ISO to get the right brightness and the look you want, with worked examples from real shooting situations.
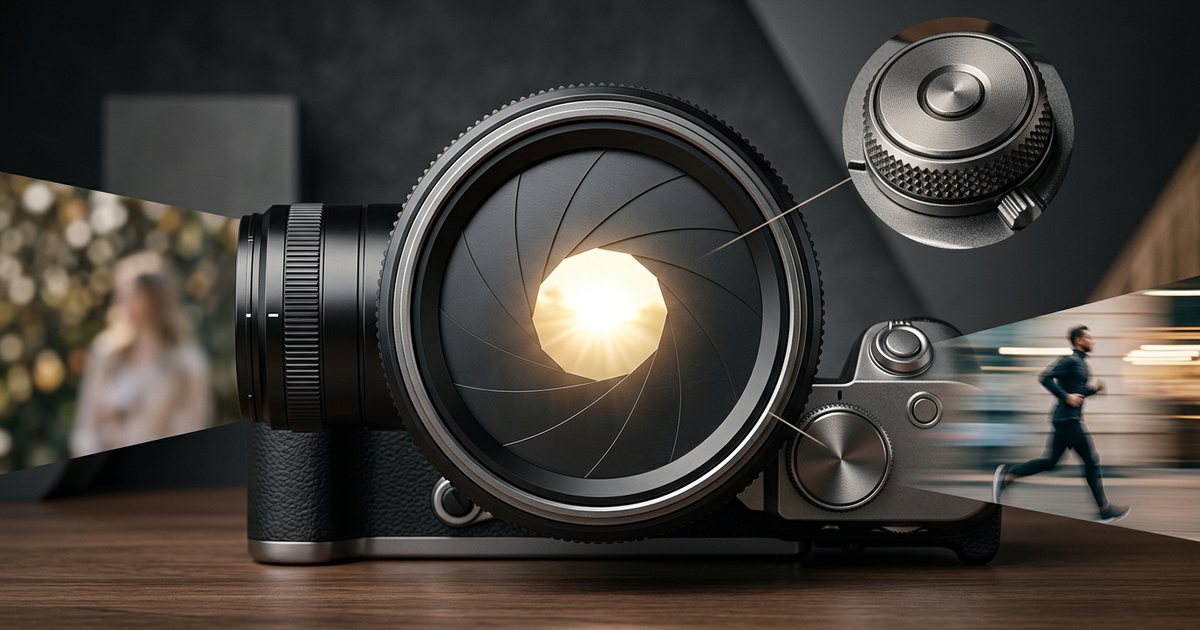
The exposure triangle is the relationship between the three settings that decide how bright a photo is: aperture, shutter speed and ISO. Each one changes the amount of light, and each has a side effect on how the picture looks: aperture changes depth of field, shutter speed changes how motion is recorded, and ISO changes how much noise you see. Getting exposure right means choosing the combination that delivers the right brightness and the look you want at the same time. It is one of the core skills covered in our photography fundamentals guide.
Stops: the shared unit
Light in photography is measured in stops. One stop more exposure means twice as much light reaching the sensor; one stop less means half. What makes stops useful is that all three settings share them, so you can take a stop from one setting and give it back through another without changing brightness.
- Shutter speed in full stops: 1/1000, 1/500, 1/250, 1/125, 1/60, 1/30 s. Each is roughly double the time of the one before.
- ISO in full stops: 100, 200, 400, 800, 1600, 3200. Each is double the sensitivity of the one before.
- Aperture in full stops: f/1.4, f/2, f/2.8, f/4, f/5.6, f/8, f/11, f/16, f/22. Each lets in half the light of the one before.
The aperture numbers look odd because they step by a factor of about 1.4, the square root of 2. The amount of light follows the area of the opening, not its diameter, and doubling the area means multiplying the diameter by roughly 1.4. Most cameras also offer one-third-stop steps, such as f/3.2 and f/3.5 between f/2.8 and f/4.
Aperture and depth of field
The f-number is the focal length divided by the effective diameter of the opening, which is why a smaller number means a wider aperture. f/2 is wide, f/16 is narrow, and the gap between them is six full stops: f/2 lets in 64 times as much light as f/16.
The creative effect of aperture is depth of field, the zone in front of and behind the focus point that looks acceptably sharp. A wide aperture gives a shallow depth of field that separates a person from a soft background; a narrow one keeps more of the scene sharp. Aperture is not the only factor, though. Depth of field also gets shallower as you move closer to the subject or use a longer focal length.
Starting points by type of work:
- Portrait with a soft background: f/1.8 to f/2.8. Up close, the sharp zone may be too thin to cover both eyes.
- A group in two rows: f/5.6 to f/8 so everyone is sharp.
- A small product up close: f/8 to f/11, because depth of field becomes very thin at close range.
- Landscape or architecture: f/8 to f/11.
A practical warning: very small apertures such as f/16 and f/22 soften the whole image through diffraction. Most lenses are at their sharpest two or three stops down from their widest aperture, so do not stop down further than the depth of field actually requires.
Shutter speed and motion
Shutter speed is how long the sensor is exposed. Its creative effect is how movement appears: a short time freezes the moment, while a long time turns movement into blur that can be either a mistake or a deliberate style.
Guideline values to start from; the right figure depends on how fast the subject moves and how close it is:
- Someone walking or speaking on stage: around 1/250 s.
- Children running, or sport: 1/1000 s or faster.
- Panning with a moving car: 1/30 to 1/125 s, so the car stays sharp and the background streaks.
- Silky water or car light trails at night: one second or longer, on a tripod.
The handheld guideline and why stabilization changes it
The traditional guideline is that the slowest safe handheld shutter speed is roughly 1 divided by the focal length. With a 50 mm lens that means about 1/50 s; with a 200 mm lens, 1/200 s. On a camera with a sensor smaller than full frame, multiply the focal length by the crop factor first: a 50 mm lens on a 1.5x sensor needs around 1/75 s. High-resolution sensors reveal small amounts of shake more clearly, so you may need to go faster than the guideline suggests.
Image stabilization, whether in the lens or in the camera body, lets you hand-hold several stops slower than the guideline, and each manufacturer states how many stops it rates its system for. But stabilization only cancels your own movement. It does nothing for a moving subject: a person walking past at 1/15 s will still be blurred however good the stabilizer is.
ISO and noise
ISO sets how much the signal from the sensor is amplified. Raising it brightens the image without touching aperture or shutter speed, but at a price: more visible noise (grain and color speckles, especially in the shadows) and less dynamic range, which is the ability to hold detail in shadows and highlights at the same time.
Working rules:
- In good light, start at your camera's base ISO, which is often 100 or close to it.
- Do not hesitate to raise ISO when the alternative is a shaky photo. A sharp image with acceptable noise always beats a clean, blurred one.
- On most cameras, a correct exposure at a higher ISO gives a result as clean as, or cleaner than, a dark exposure at low ISO brightened later in software.
- Learn your camera's limits: shoot the same scene at rising ISO values, inspect the results at 100%, and decide the highest value you accept for client work.
Auto ISO is excellent for events: you set the aperture and the slowest acceptable shutter speed, and the camera raises ISO as needed up to a ceiling you choose.
Balancing the three: a worked example
These settings all give roughly the same exposure, but each produces a different picture:
| Aperture | Shutter | ISO | Result |
|---|---|---|---|
| f/2.8 | 1/500 | 400 | Blurred background, frozen motion |
| f/4 | 1/250 | 400 | A good balance for most situations |
| f/5.6 | 1/125 | 400 | More depth, risk of blur with fast movement |
| f/5.6 | 1/250 | 800 | More depth and frozen motion, slightly more noise |
Illustrative example: you are covering an opening ceremony in a hotel ballroom in Dubai. You need at least 1/250 s so speakers' faces stay sharp, your lens opens to f/2.8, and the room is fairly dim. Fix the aperture at f/2.8 and the shutter at 1/250 s, then raise ISO until the exposure is right, even if that means ISO 3200. A slightly noisy image is far better than a blurred photo of the CEO cutting the ribbon. There is more on these situations in Event and Conference Photography.
A useful old cross-check is the Sunny 16 rule: in bright sun with a clear sky, the correct shutter speed at f/16 is about 1 divided by the ISO, so 1/100 s at ISO 100. Under strong Gulf sun it gives you a quick starting point, and you can then trade stops between aperture and shutter speed to get the look you want.
Shooting modes: M, A/Av, S/Tv and P
| Mode | You set | The camera sets | Good for |
|---|---|---|---|
| M (Manual) | Aperture and shutter, plus ISO or Auto ISO | Nothing, if ISO is fixed | Steady light, studio, flash, panoramas, matching series |
| A or Av (Aperture priority) | Aperture | Shutter speed | Portraits, products, anything where depth of field matters |
| S or Tv (Shutter priority) | Shutter speed | Aperture | Sport, movement, panning |
| P (Program) | You can shift the suggested pair | Aperture and shutter | Quick snaps with no time to think |
Manual mode is not a badge of professionalism in itself. Many professionals work in aperture priority with exposure compensation, and switch to manual when the light is steady or when they need identical exposure across a series, such as a store's product shots or property brackets that will be merged later.
Metering, the histogram and exposure compensation
How the camera measures light
The camera assumes the scene averages out to a mid-gray brightness and sets exposure on that basis. It usually offers several metering modes. Evaluative or matrix metering analyses the whole frame and suits most situations; center-weighted metering gives extra weight to the middle; spot metering reads a very small area and helps when the subject is lit differently from its surroundings, like a speaker in a spotlight on a dark stage.
The mid-gray assumption breaks down in very bright or very dark scenes. The camera renders white sand or a white wall as dull gray, and a black abaya or a black product as washed-out gray. The fix is exposure compensation.
Reading the histogram
The histogram is a graph of how brightness is distributed in the image: shadows on the left, highlights on the right, midtones in between. There is no single "correct" shape. A night scene naturally bunches to the left, and a product on a white background bunches to the right. What matters is the edges. Data piled against the right edge usually means clipped highlights with no detail left; data piled against the left edge means shadows crushed to black. Turn on the highlight warning as well, which makes clipped areas flash on playback.
The in-camera histogram is normally calculated from the JPEG preview, so a RAW file may hold a little more highlight detail, but do not count on it. And do not judge brightness from the rear screen, especially in strong sun or with the screen brightness turned up. Trust the histogram.
Exposure compensation
In A/Av, S/Tv and P modes, the exposure compensation control (±) tells the camera to make the picture brighter or darker than it calculated. Typical uses: +1 to +2 for bright scenes such as sand or a product on white, and around -1 for dark scenes or to protect a bright sky. For very high-contrast scenes, bracketing captures several frames at different exposures for merging later, a common technique in Real Estate and Architectural Photography.
Common mistakes and how to avoid them
- Keeping ISO low at all costs: the result is shaky photos. Raise ISO before you drop the shutter speed below the safe limit.
- Judging brightness by the rear screen: check the histogram instead.
- Always shooting wide open: in group and product shots, part of the subject falls out of focus.
- Forgetting the last session's settings: starting a daylight shoot at ISO 3200 left over from last night's event. Reset after every session, or check settings before the first frame.
- Confusing camera shake with subject motion: stabilization and tripods fix the first; only a faster shutter or flash fixes the second.
Practical checklist
- Decide the priority: motion (start with shutter speed) or depth of field (start with aperture).
- Set the second control within its safe limits.
- Raise ISO only as far as needed to complete the exposure.
- Take a test shot and check the histogram and highlight warning.
- Correct with exposure compensation or a manual adjustment, then lock the settings if the light is steady.
The amount of light available decides how much room you have in the triangle, so improving the light itself is often easier than fighting the settings, as explained in Lighting in Photography. And when you need a wider aperture or better stabilization, Choosing the Right Camera and Lenses will help you decide what to look for.